FACEFORMER® Training
Three Steps to Success
This is the right way to exercise!
This is the right way to exercise!
Regular FACEFORMER training has an effective influence on cranial nerve functions and brain performance, on pattern formation and coordination, on the tension of tissues, muscles and skin in the mouth, throat and facial regions, on body statics, body movements and sensory performance. However, causal therapies such as FACEFORMER therapy do not produce overnight success. Rather, constant practice brings about a gradual approach to the desired goal until what has been achieved is finally stabilized in the long term. Continued dependence on burdensome medications and annoying aids is thus avoided.

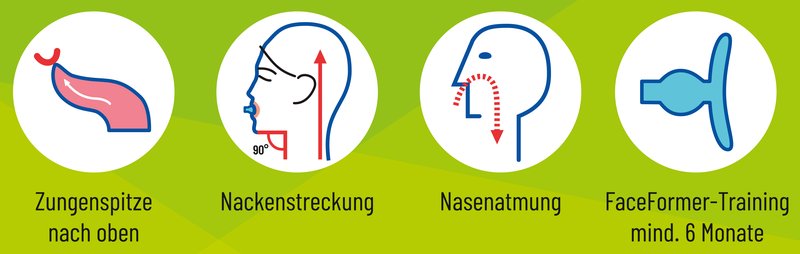
FACEFORMER exercises are easy to perform and quickly achieve success with little effort. First results are often noticeable after only a few days. Through daily training a good development is usually to be expected after approx. 6-10 weeks. The exercises are to be carried out for a total of six months. Be patient and stay tuned! The new patterns of movement and behaviour have to be practiced and automated until they have become flesh and blood. Finally, regular use of the FACEFORMER can be dispensed with.

Experience shows that FACEFORMER therapy often brings about noticeable positive changes after only a short time. However, in order to stabilize the success permanently, it is essential that the application is carried out over the intended period of time. When physiological movement patterns, postures and muscle tensions have finally become automated, the therapy is complete and your perseverance pays off!
Successful start into FACEFORMER training
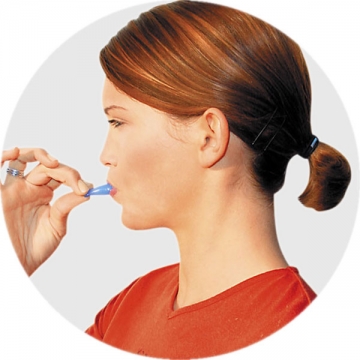
Schritt 1: Startposition
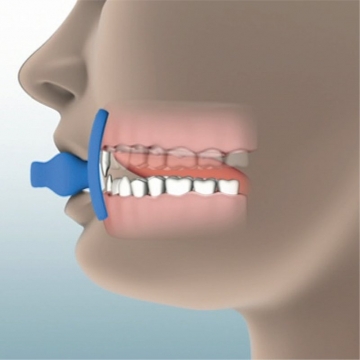
The FaceFormer is placed in the oral vestibulum.
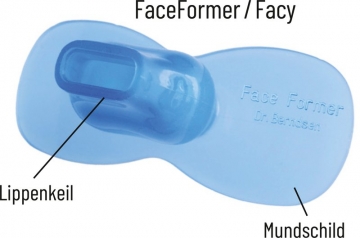
FACEFORMER according to Berndsen/Berndsen with lip wedge and mouth shield (membrane)
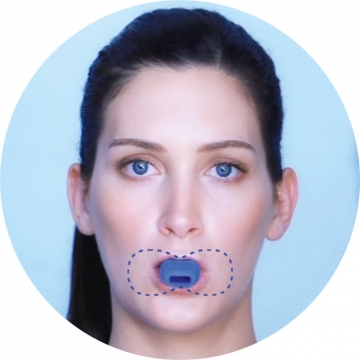
This is how to place the FaceFormer
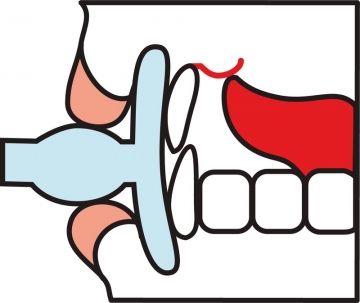
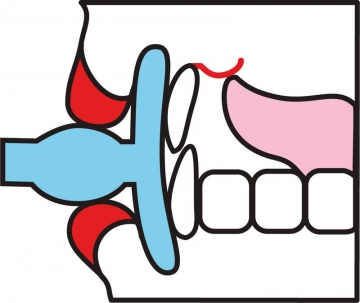
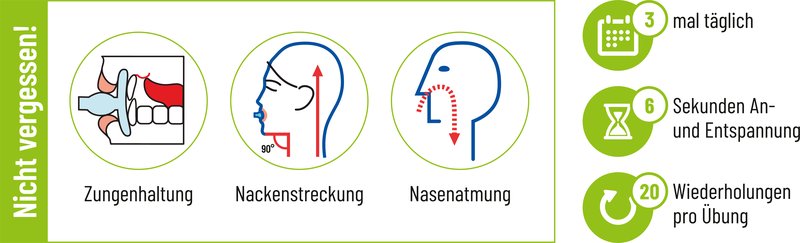
Proper position of the tongue tip
Head position and straightened neck
The head is upright and the neck is stretched. This natural proper head posture is always maintained and must become a habit. It determines the head balance, body posture and body statics.
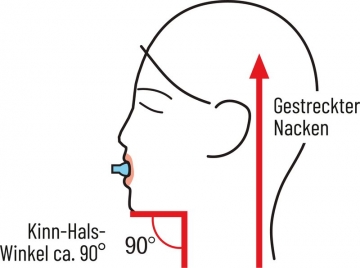
Head upright and neck stretched out
The upper incisors are in front of the lower ones.*
Do not push the lower outward.
The temporomandibular joints adjust to a natural, relieved position.
* Exception: If the lower jaw is protruding, the usual position can be maintained.
Upper incisors are in front of the lower ones
Nose breathing accompanies all exercises.
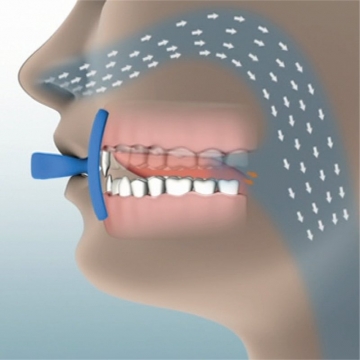
Nasal breathing accompanies all exercises
Schritt 2: Übungen

A) Press lips
B) Relax lips
Pulling exercise
Pulling exercise – Pull forward
Step 3: Nightly Application
Due to the training your nasal breathing improves noticeably after about 2-3 weeks.
Additionally, insert the FaceFormer now also at night.
The nightly application promotes
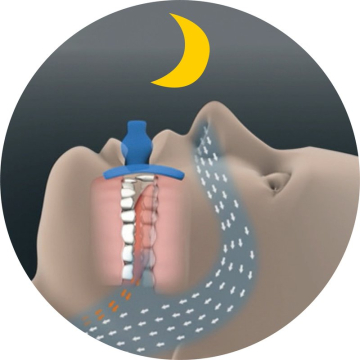
Nightly FACEFORMER application supports the habituation of nasal breathing.

After 14 days, insert the FaceFormer also at night.
The Path to Your Success

Video:Getting started with FACEFORMER training